Webforms and Lead Sources Process
Last updated: July 30, 2026
Purpose: This document is intended to provide an overview of how lead recruiters create webforms, publish them, connect them to lead sources, and configure how incoming leads are routed in the PRM.
Overview
Webforms and Lead Sources work together. Webforms collect patient submissions. Lead Sources define where a lead comes from and what the PRM should do when that lead is received.
Webforms
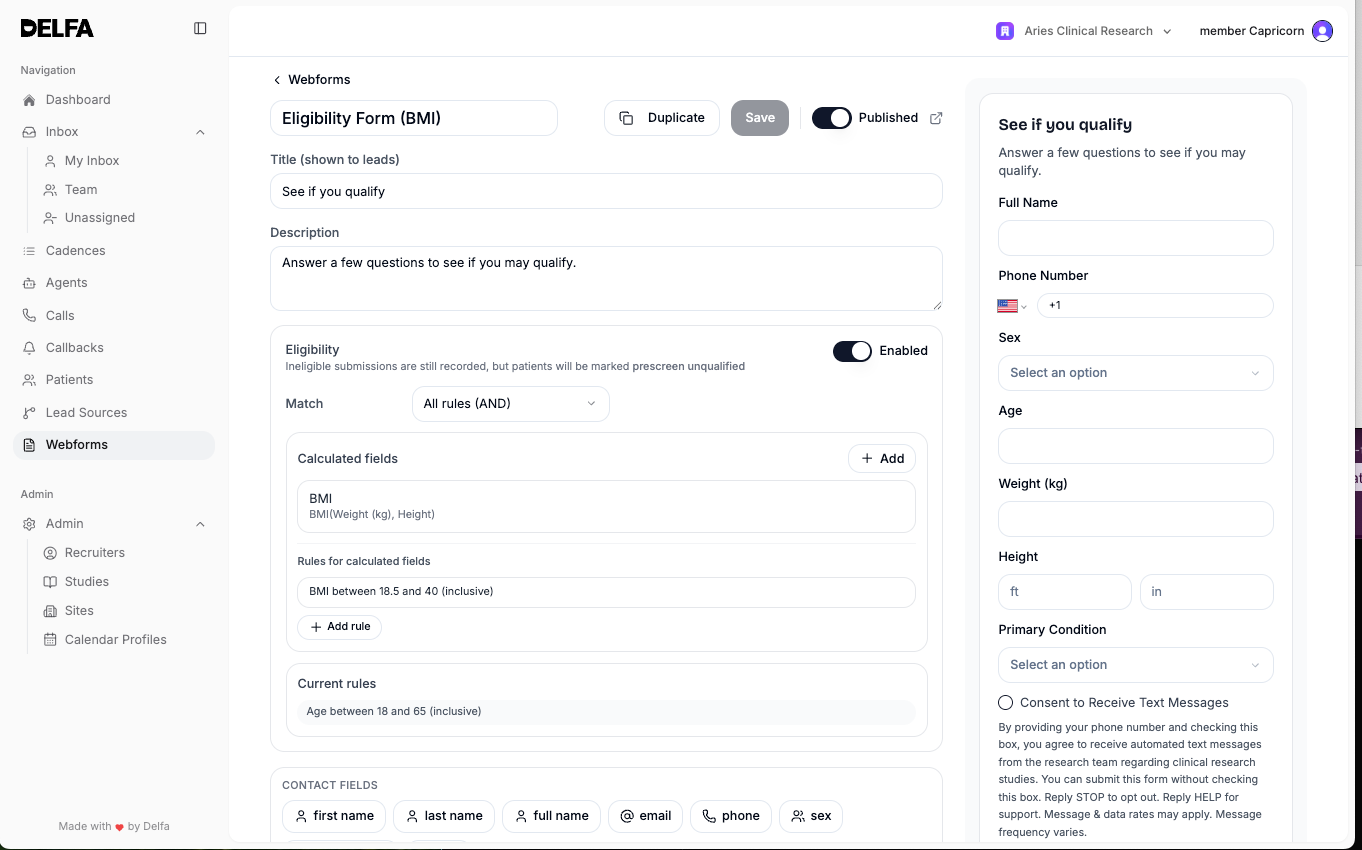
Creating a Webform
Open Webforms.
Select New Webform.
Enter the webform name and title.
Add form fields and save changes.
Webform Configuration
Field Setup
Add fields using the form field tools.
Reorder fields as needed.
Remove fields that should not appear on the final form.
Review contact fields carefully so the correct primary contact information is collected.
Eligibility
Configure eligibility rules for the webform fields.
Clean up eligibility rules whenever fields are added, removed, or renamed.
Publishing a Webform
Save the webform before publishing.
Publish the webform when it is ready to receive submissions. You can click on the external link icon to see how leads will see the form
If the webform is being published for the first time, a shortcut button will appear to create a Lead Source. This prepopulates the name and selects the webform.
After publishing you can copy the embed link and paste it into your web pages. The form will be embedded on the site
Webform Maintenance
Use the Webforms list to review draft vs published status.
Use submissions to review incoming form responses.
Duplicate a webform when a new version is needed without changing the original.
Lead Sources
Lead Sources determine how incoming leads should be handled after submission.
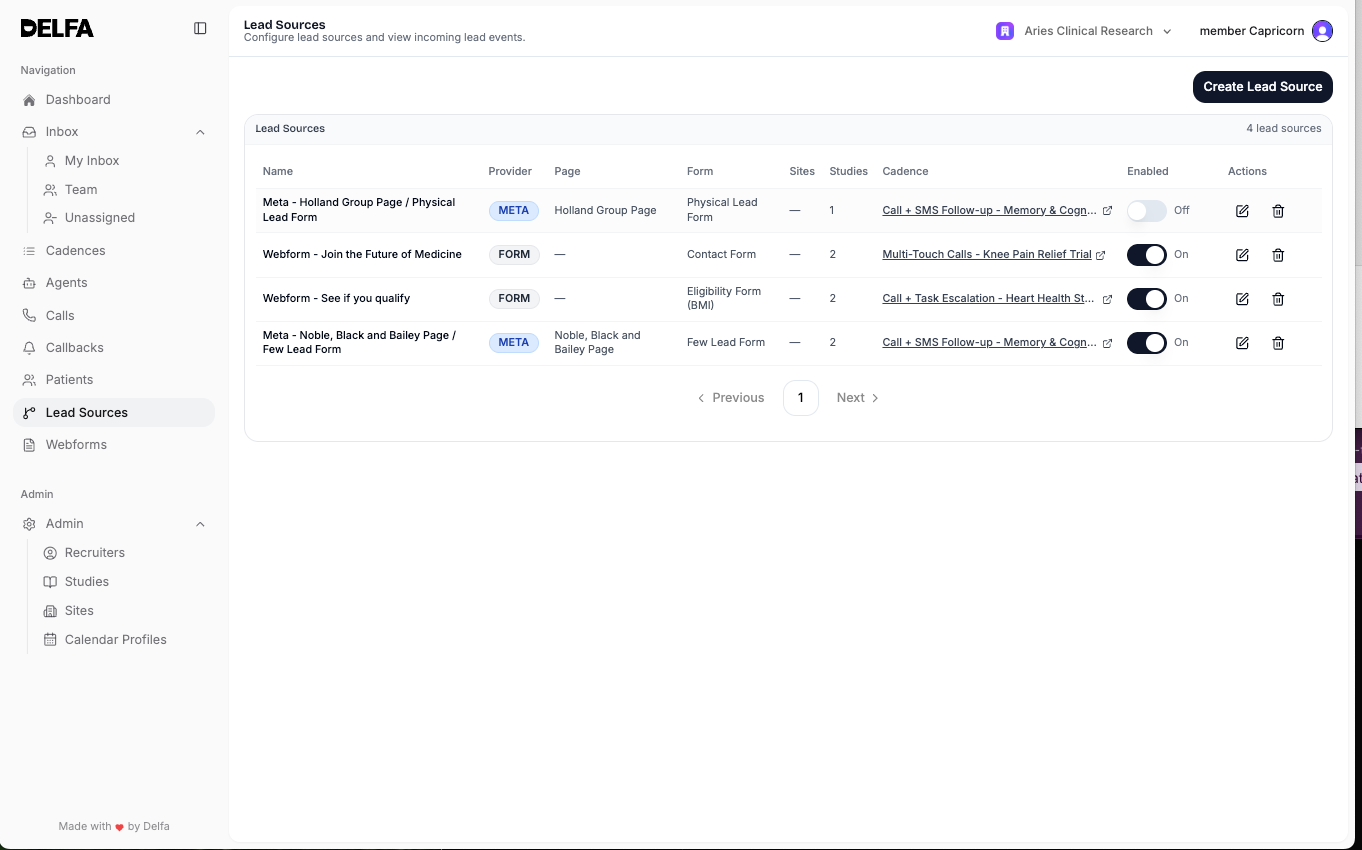
Creating a Lead Source
Open Lead Sources.
Select Create Lead Source.
Choose the provider.
Complete the trigger setup on the left side.
Complete the automation outcome setup on the right side.
Save the lead source.
Lead Source Providers
Webform
Use when leads are coming from a published PRM webform.
Select the published webform that should create leads.
Meta
NOTE: This first requires setting up an automation on our end
Use when leads are coming from a Meta page and lead form.
Enter or select the Meta Page and Meta Lead Form.
Lead Source Outcome Setup
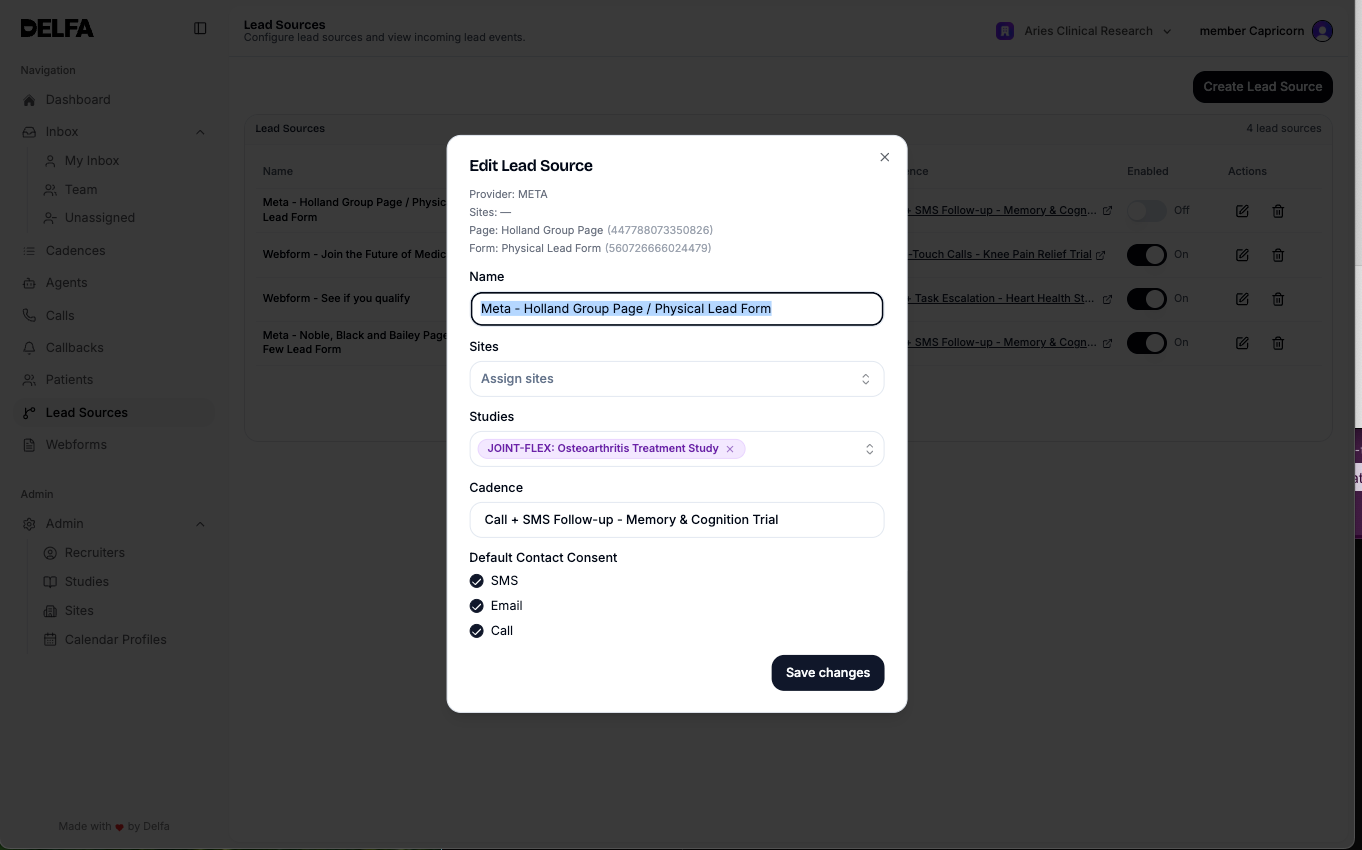
Sites
Select the site or sites that should be assigned when a lead arrives.
Studies
Select the study or studies that should be assigned when a lead arrives.
Cadence
Select a cadence if Delfa should automatically start a cadence for new leads from that source.
Default Contact Consent
Set default SMS, email, and call consent values based on how that lead source should be handled operationally.
Lead Source Maintenance
Edit lead source name, sites, studies, cadence, and default consent settings when routing changes.
Enable or disable a lead source without deleting it when intake should be paused temporarily.
Delete a lead source only when it should no longer capture new leads.
Lead Event Review
Open a lead source detail page to review lead events.
Review event status, eligibility result, patient link, cadence link, and raw submission data when troubleshooting or confirming intake behavior.
When to Use Webforms and Lead Sources Together
Build and publish the webform first.
Then create or update the lead source so submissions route to the correct site, study, and cadence.
Review the first live submissions after launch to confirm the workflow is behaving as expected.
Best Practices
Publish webforms only after field order, eligibility rules, and wording have been reviewed.
Connect each production webform to the correct lead source before sharing it publicly.
Keep site, study, and cadence routing current in the lead source configuration.
Review lead events after setup changes to confirm leads are being processed correctly.
Use duplication when creating a variant of an existing webform rather than editing a live form without review.