Patients and Groups Process
Last updated: June 30, 2026
Purpose: This document is intended to provide an overview of how recruiters use the PRM Patients page to search the patient database, apply filters, save groups, import patients, and perform bulk actions.
Process
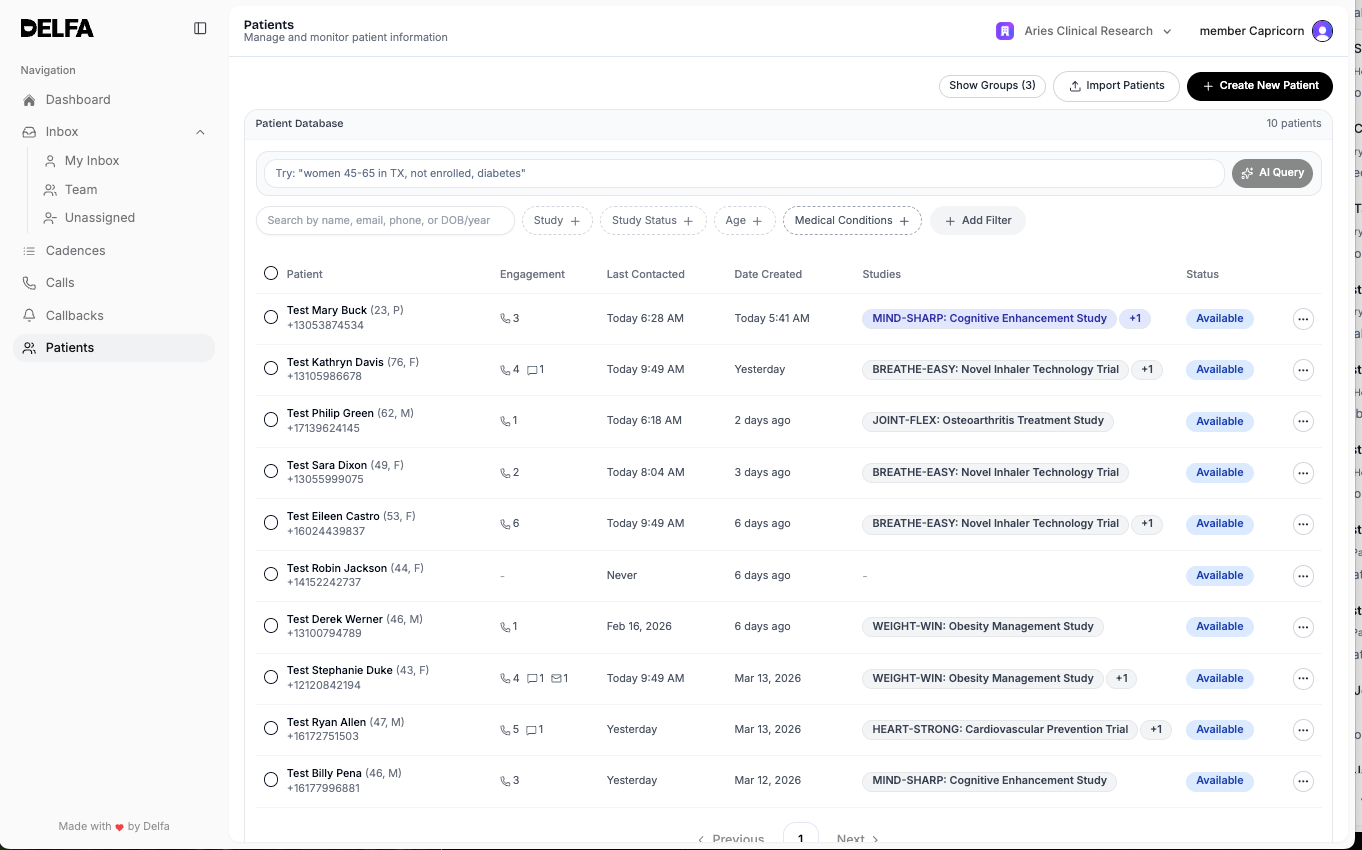
The Patients page is used to find individual patients, identify cohorts, and complete bulk workflow actions. Recruiters should confirm that the correct filters are applied before saving groups or performing any bulk action.
Searching and Filtering
1. Open the Patients page.
2. Use the search bar to search by patient name, email, phone, date of birth, or year of birth.
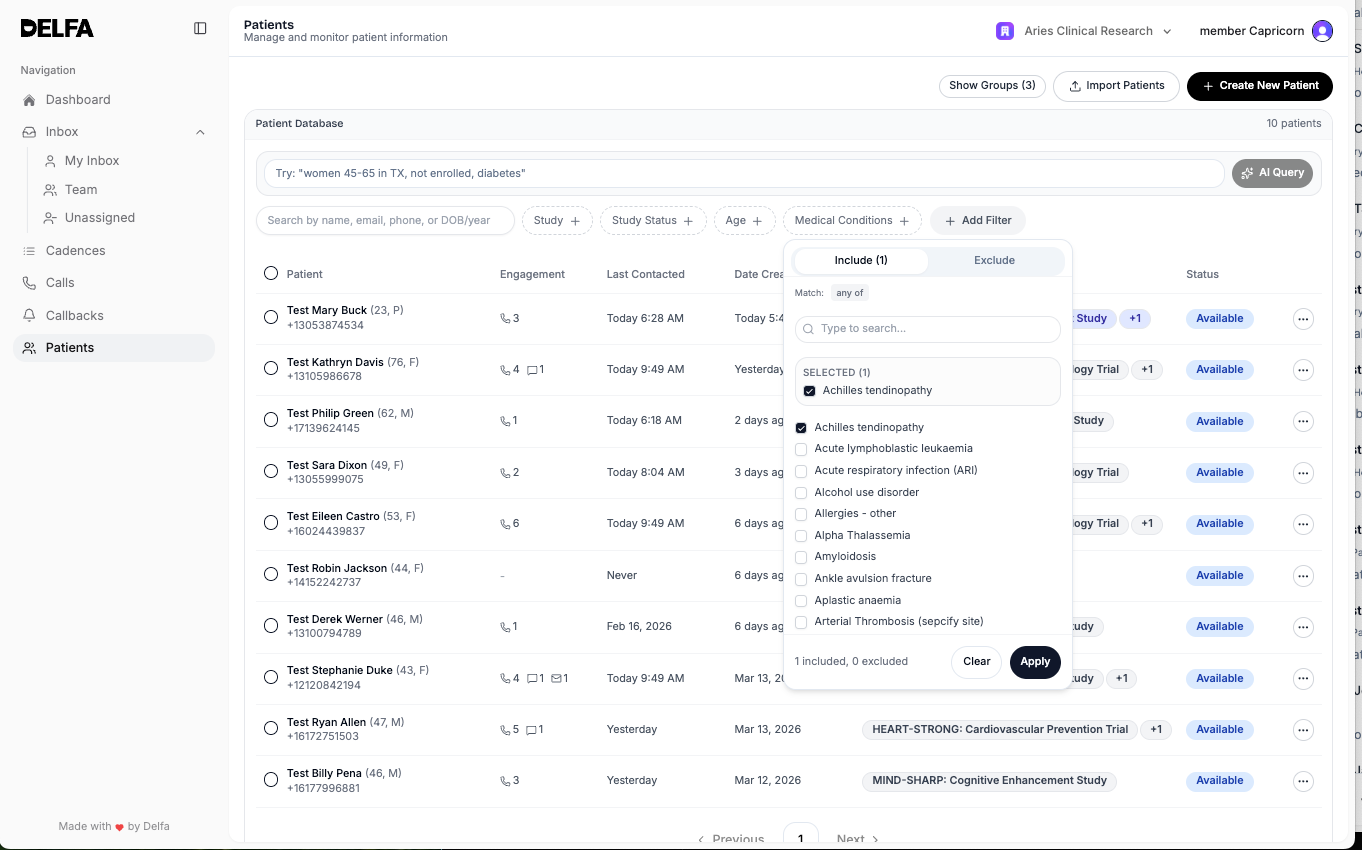
3. Use the filter bar to narrow the patient list by study, site, source, consent, status, or other available criteria.
4. If enabled, use the AI query bar to translate a plain-language search into PRM filters.
5. Confirm the result count before moving forward with exports, saved groups, or bulk actions.
Static Groups
- Static Groups are saved from selected patients.
- Select one or more patients, then choose Save Group and select Static Group.
- Use static groups when you want to preserve a fixed set of patients even if filter results change later.
Live Groups
- Live Groups are saved from the current filter criteria.
- Choose Save Group and select Live Group after filters have been applied.
- Use live groups when you want the list to update automatically as patients begin or stop matching the saved criteria.
Managing Groups
- Use Show Groups to review saved static and live groups.
- Select a group to apply it to the current patient list.
- Lead recruiters can manage, rename, update, and delete saved groups from the management dialogs.
Patient Review
- Select a patient row to open the patient profile.
- Use the patient profile when a full review is needed before making changes.
- Use the table actions when you need to assign a study, add a cadence, or review duplicates without leaving the patient list.
Importing Patients
Import Patients
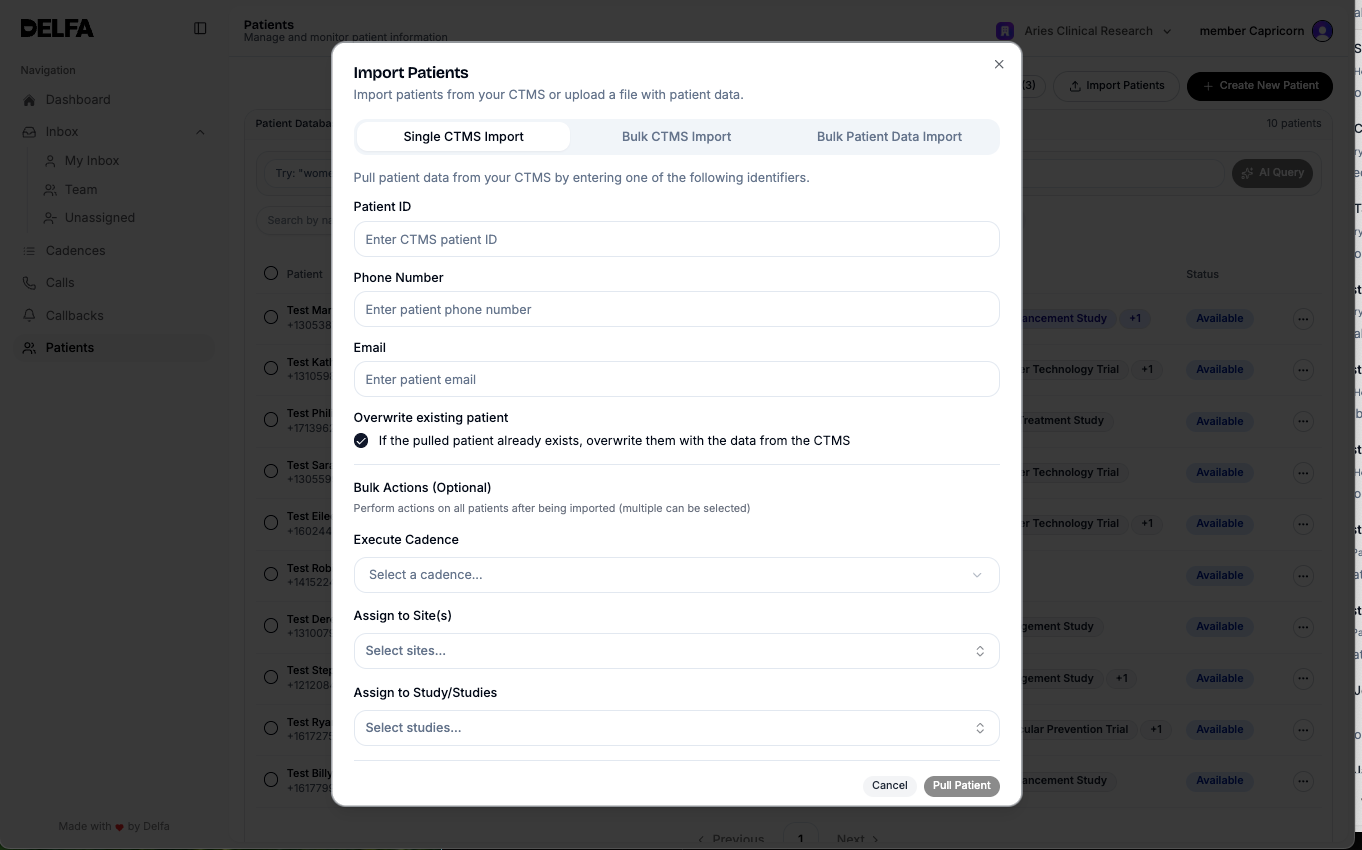
- Use Import Patients to bring patients into the PRM.
- If CTMS integration is enabled, Single CTMS Import and Bulk CTMS Import are available.
- Bulk Patient Data Import can be used to upload a file with patient data.
- Confirm that imported patients are reviewed for duplicates and correct study or site placement after import.
Creating a Patient
- Use Create New Patient to create a patient manually in the PRM.
- Review contact details carefully before saving so future communication and cadence actions work correctly.
Bulk Actions
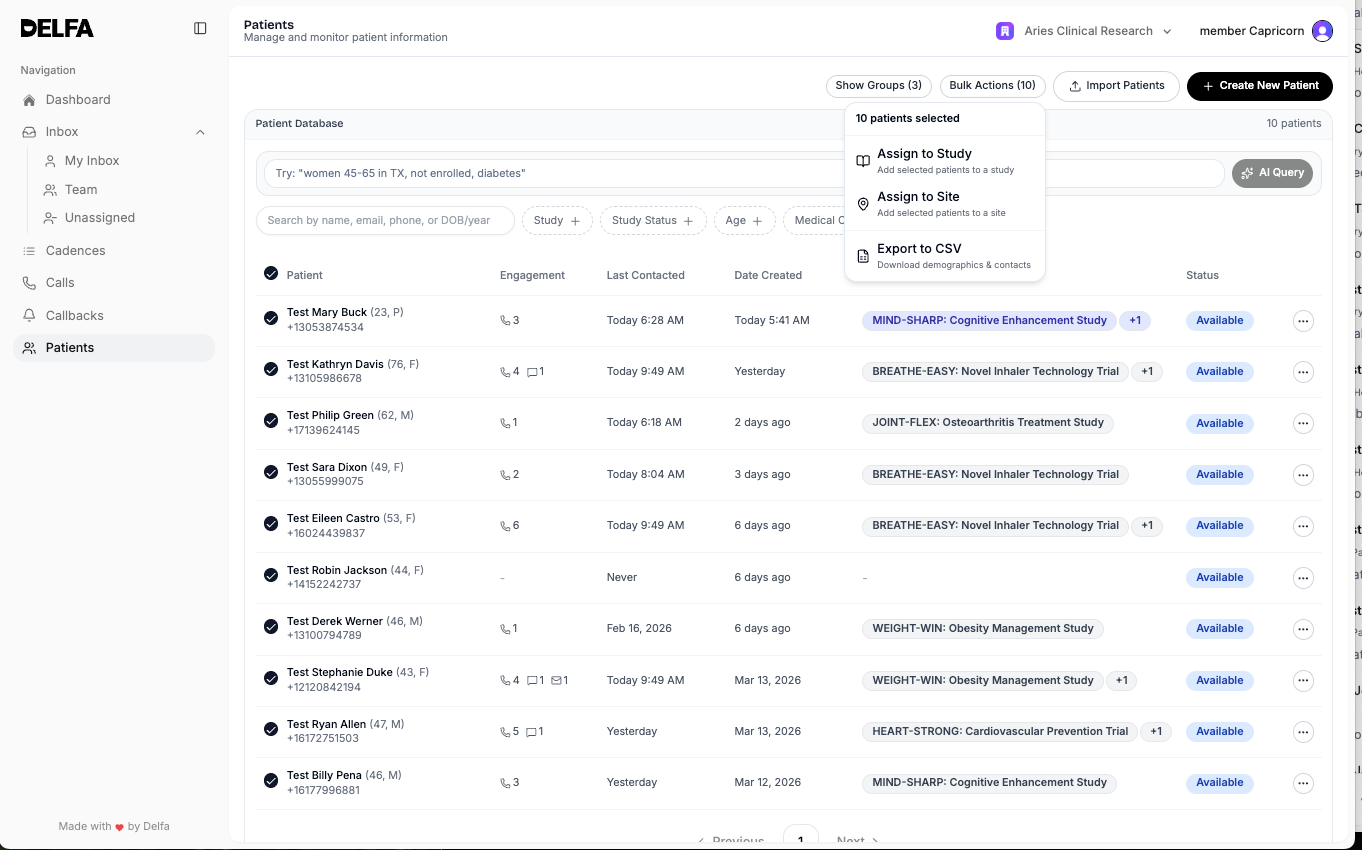
Bulk Actions become available after patients are selected.
Assign to Study
- Use when the selected patients should be added to a study.
- A source is required to document how the patients were sourced for that study assignment.
Assign to Site
- Use when the selected patients should be placed under a site.
Enroll in Cadence
- Use when the selected patients should begin the same cadence workflow.
- If the cadence creates new study assignments, provide the study assignment source before starting.
Export to CSV
- Use to download the selected patients’ demographics and contact data.
- Confirm the selected patients before exporting.
Delete Patients
- This action is restricted by role.
- Only use when permanent removal has been approved.
Best Practices
- Always confirm the current filter set before selecting all filtered patients.
- Use static groups for one-time cohorts and live groups for reusable saved searches.
- Review duplicates and core contact information after import.
- Add clear sources for study assignment actions so downstream users understand how the patient entered that workflow.