Unified Inbox
Last updated: July 1, 2026
Purpose: use the Unified Inbox to review patient conversations, respond to patients, create follow-up tasks, and access patient details during recruitment.
1. Inbox layout
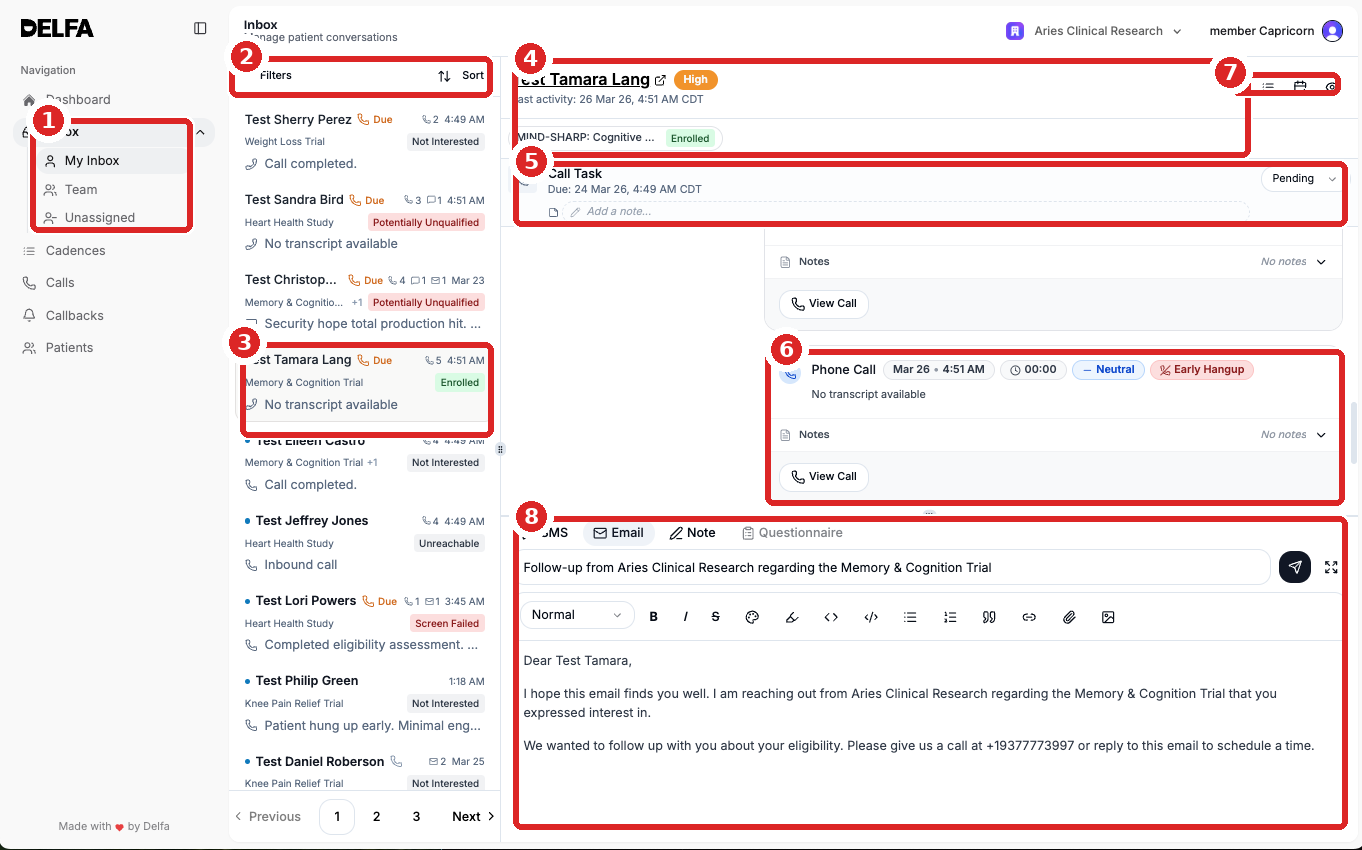
The Inbox is the main workspace for patient communication. Start by choosing the right queue, then review the thread before taking action.
Steps / callouts
Choose My Inbox, Team, or Unassigned.
Use filters or sort only when needed.
Select the conversation from the list.
Check the patient header and study strip.
Review any pending task.
Read the interaction timeline.
Use the action icons for calls, tasks, cadence, or patient profile.
Use the composer for SMS, email, or note.
Avoid
Replying before reviewing the latest interaction.
Working Team or Unassigned without checking ownership.
2. Send an SMS or email
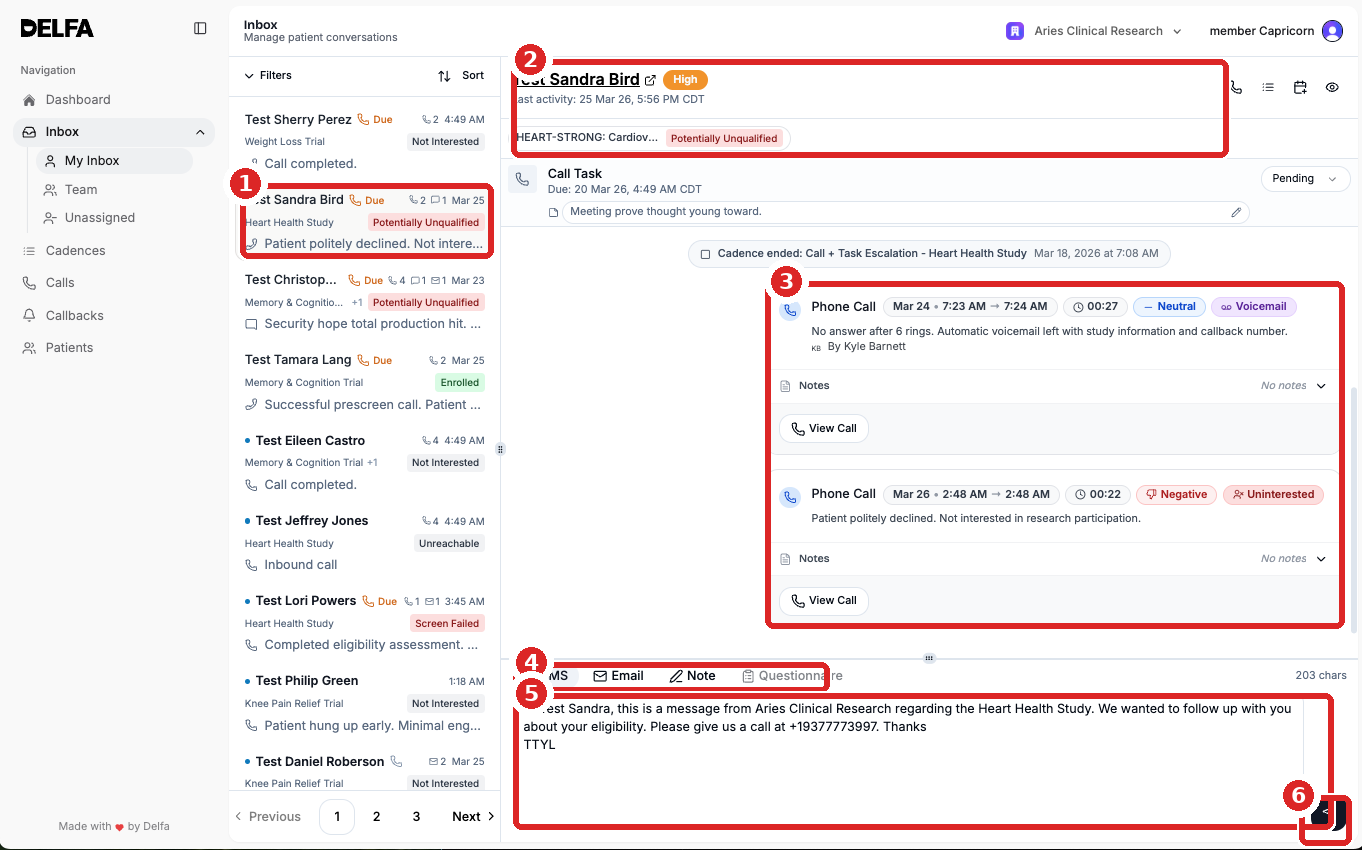
Use the composer at the bottom of the conversation. Review the thread first so the patient does not receive duplicate or conflicting information.
Steps / callouts
Confirm the selected patient.
Check study and status context.
Review recent timeline activity.
Choose SMS or Email.
Write the message.
Send once reviewed.
Check
Correct patient and study.
Latest interaction reviewed.
No duplicate message already sent.
3. Create a follow-up task
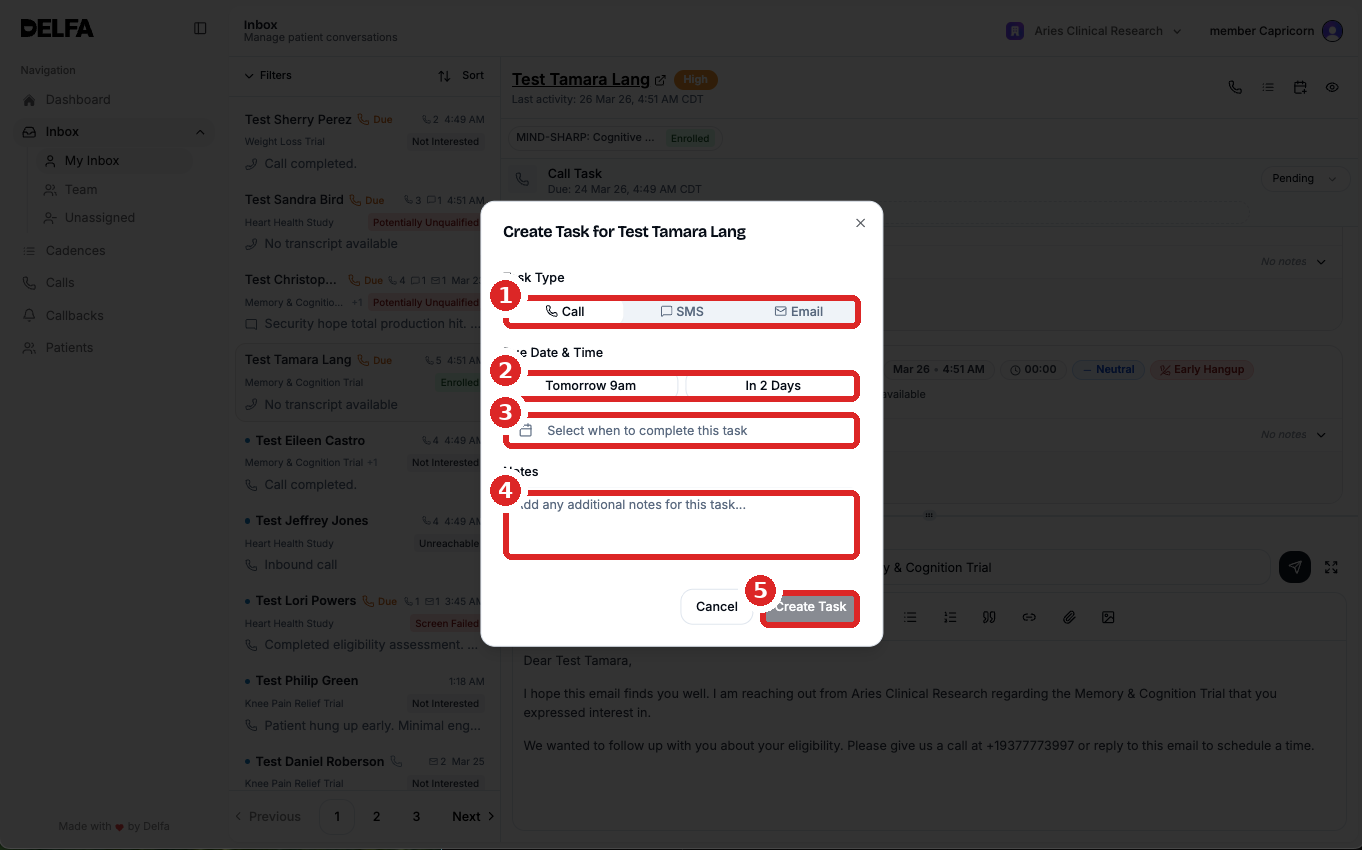
Create a task when follow-up is needed on a future date. Notes should be clear enough for another recruiter to pick up the next step.
Steps / callouts
Select task type: Call, SMS, or Email.
Choose due date and time.
Use the custom date field if needed.
Add clear next-step notes.
Create the task.
Task note standard
Write the actual next action.
Update or complete the task when done.
4. Open patient details
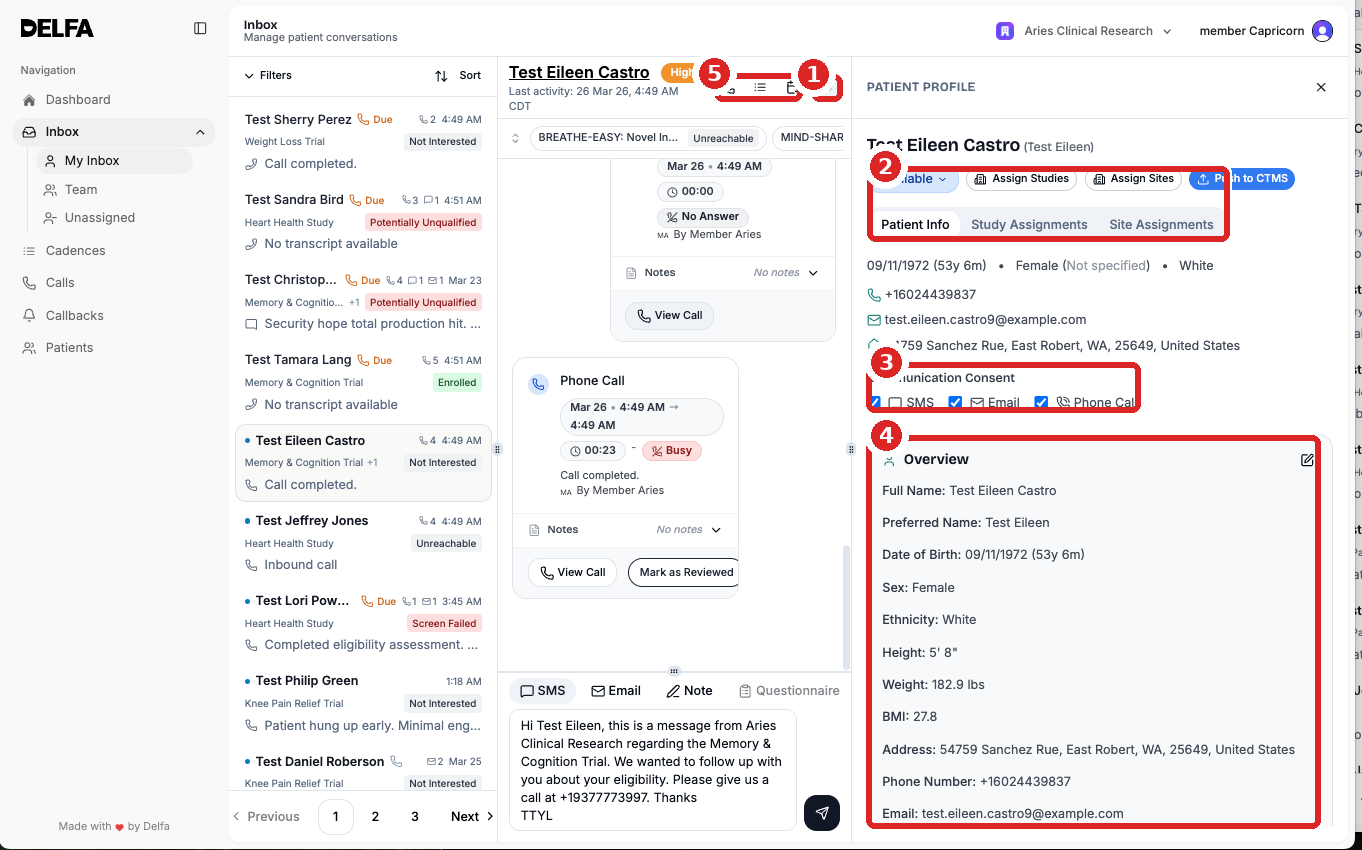
Use the patient profile panel when the conversation does not give enough context. Check consent before contacting the patient.
Steps / callouts
Open the patient profile panel.
Review Patient Info, Study Assignments, or Site Assignments.
Check communication consent.
Use Overview for key patient details.
Use the phone icon only when call consent is valid.
Important
Do not call, text, or email where consent is revoked.
Use the full profile when more detail is needed.
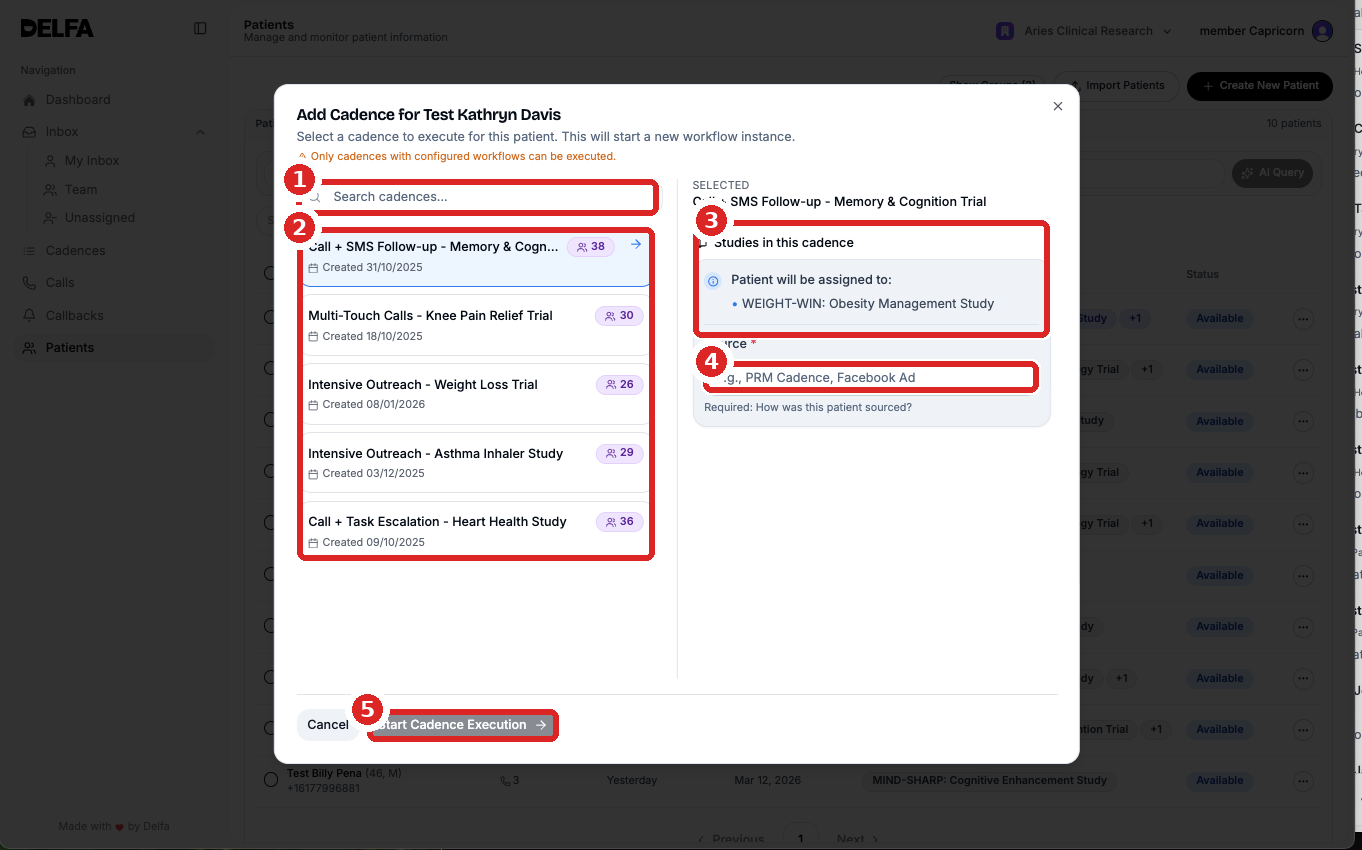
5. Add a cadence
Add a cadence only when the patient should enter that workflow. Confirm the patient status and study context first.
Steps / callouts
Search for and select the cadence.
Review the selected cadence.
Check the studies included in that cadence.
Complete the required source field.
Start the cadence execution.
Before starting
Check contact details and consent.
Avoid conflicting active cadences.
Unified Inbox quick reference
Common mistakes
Replying before reading the latest interaction.
Forgetting to create a task for future follow-up.
Calling a patient who has revoked call consent.
Starting a cadence without checking current status and existing workflows.